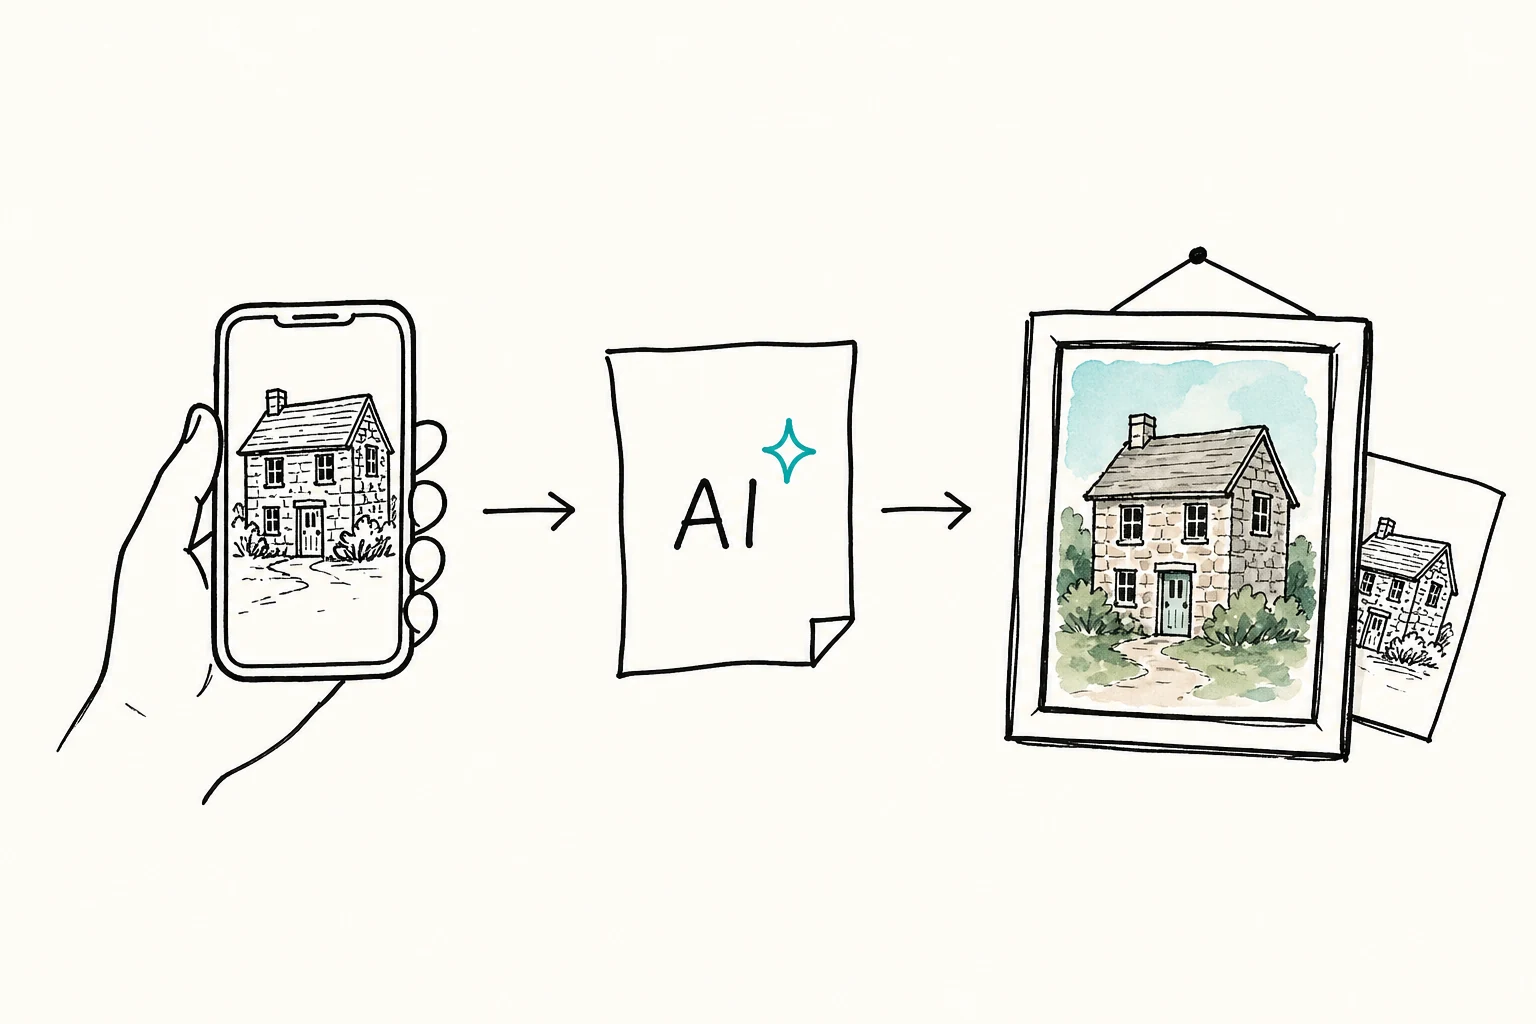
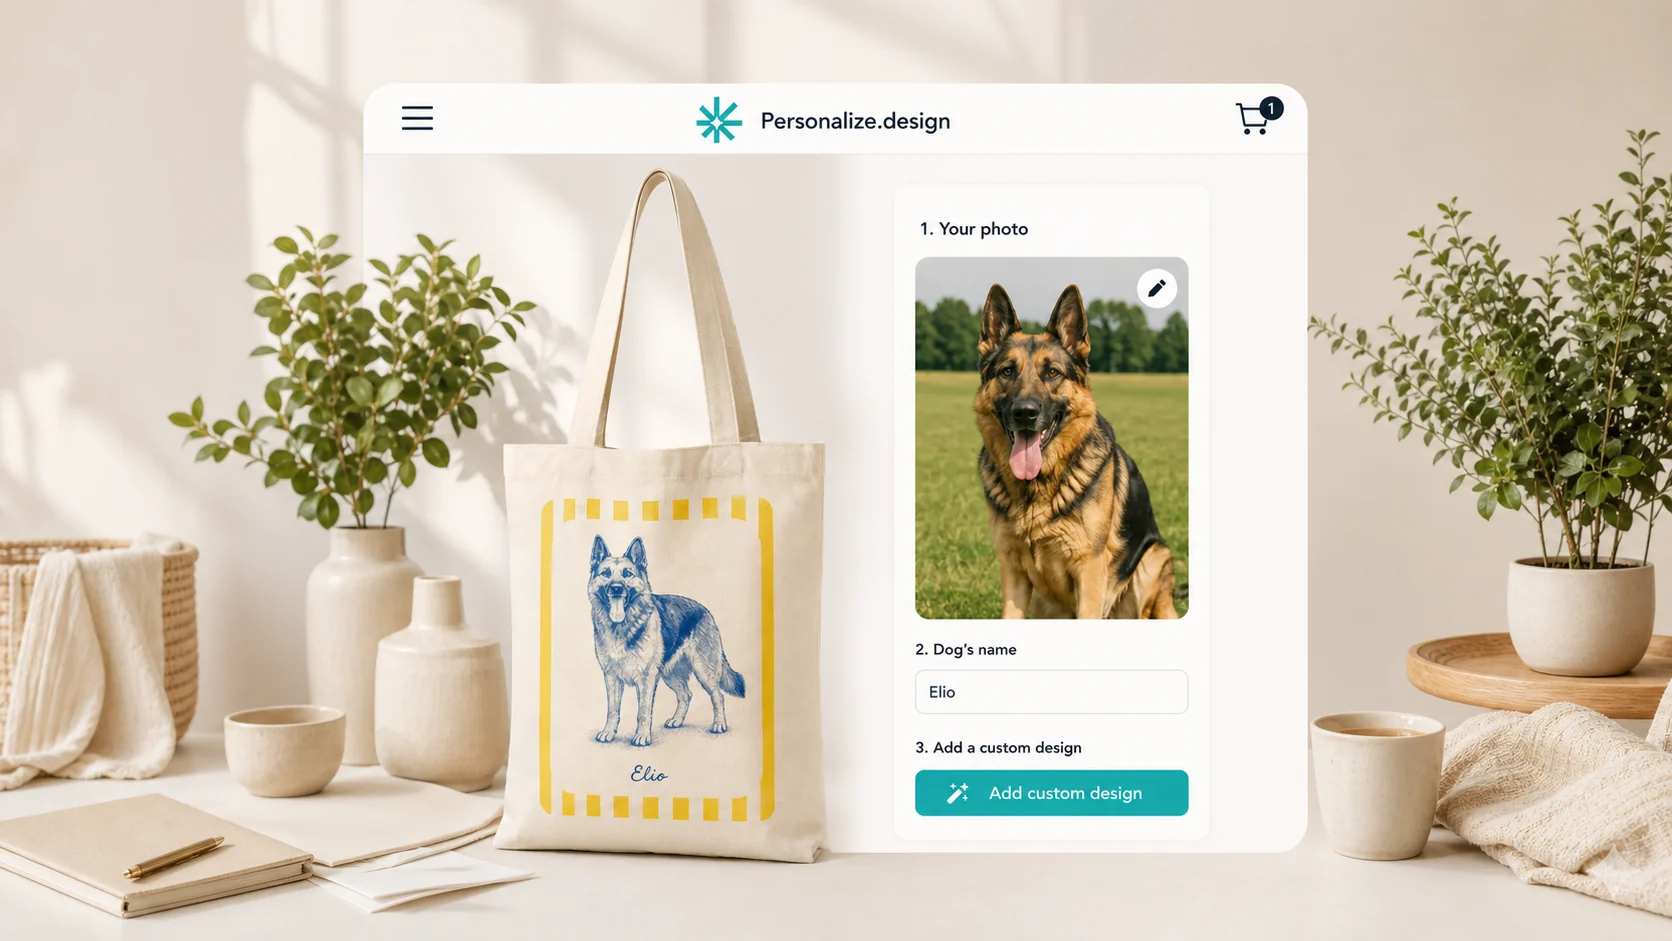
An AI product personalizer for Shopify is a good fit when you want to sell designs that feel made for the buyer, not generic templates. It is especially useful when you want to offer artwork that would traditionally require an artist, stand out from similar stores, avoid spending days learning a complex customizer, and create products with enough perceived value to support a higher price.
The workflow turns a photo or another customer input into a product preview, then carries the approved artwork into the order and the right print-on-demand process. If it only creates a nice image, you have a design tool. You do not yet have a product workflow.
This guide shows how to find a product idea, launch one product, and use a concrete preview to catch problems before they become support tickets. Start with the Shopify guides.
The opportunity is bigger than a new image
The useful change is that you can start from a product concept that already works in your niche, then rebuild the idea around each buyer. Search personalized pet mugs on Etsy, for example, and study the product format, the occasion, the visual treatment, and the way the listing explains the offer.
You can recreate that winning product logic with your own artwork, brand, product, and personalization flow. Do not copy protected artwork or another seller’s listing. Recreate the structure that makes the offer easy to understand, then make it yours.
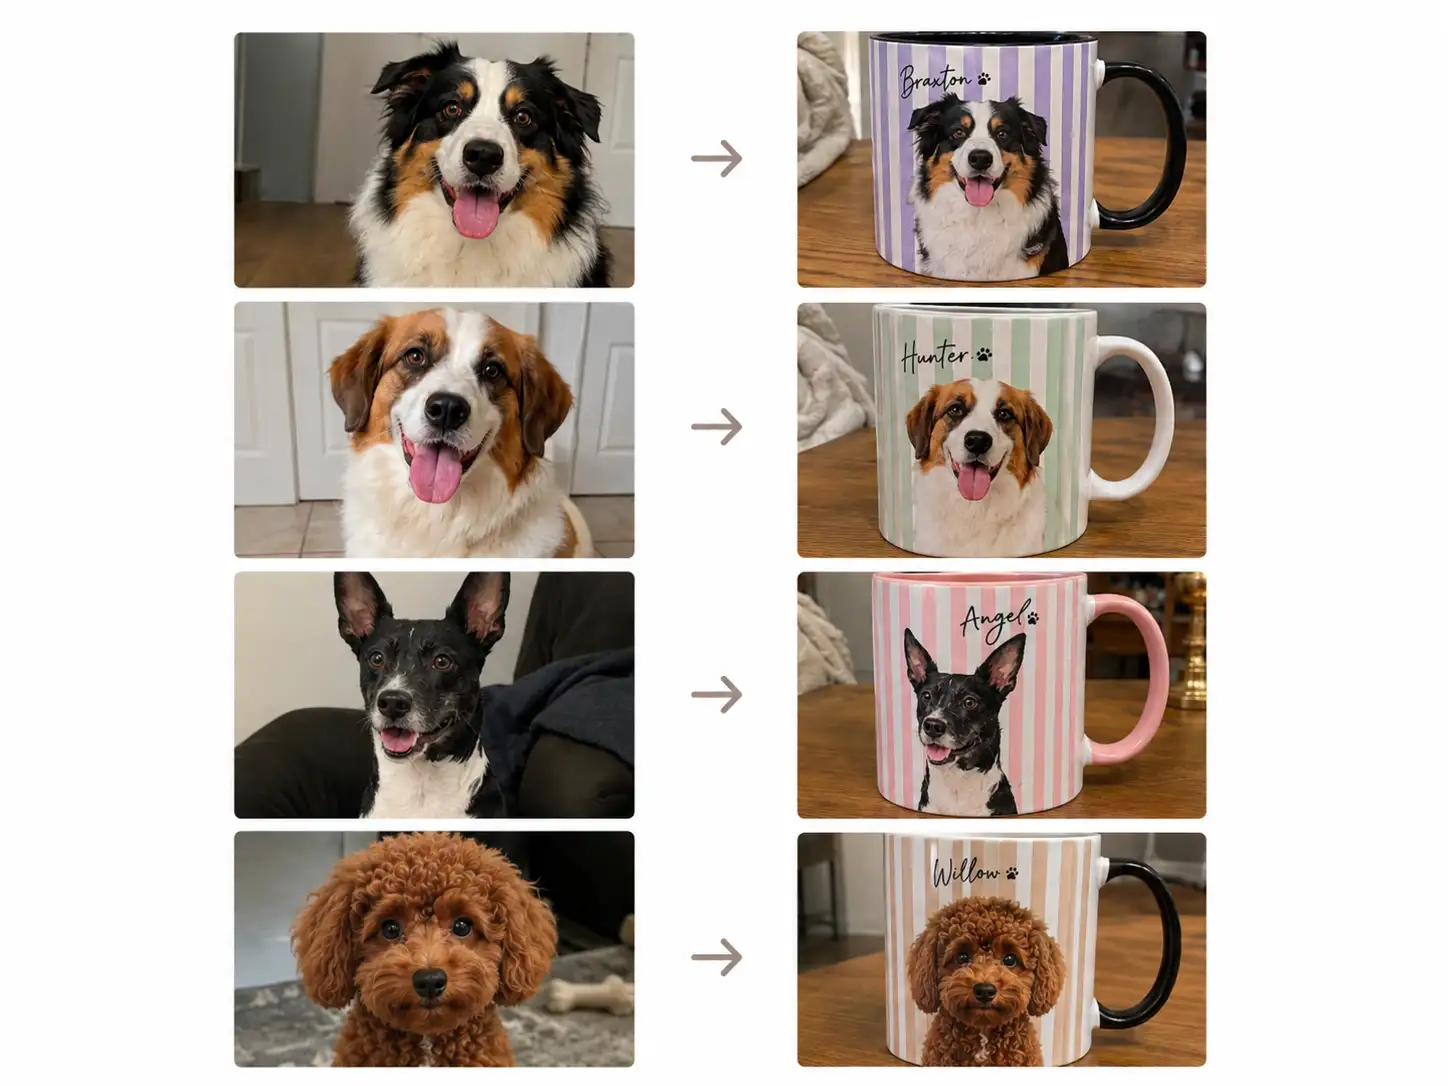
That opens creative options that were hard to offer before: one product can become a portrait in a consistent style for every buyer, a group of different pets can share one mug collection, and a single Blueprint can turn the same idea into several products after the first one works.
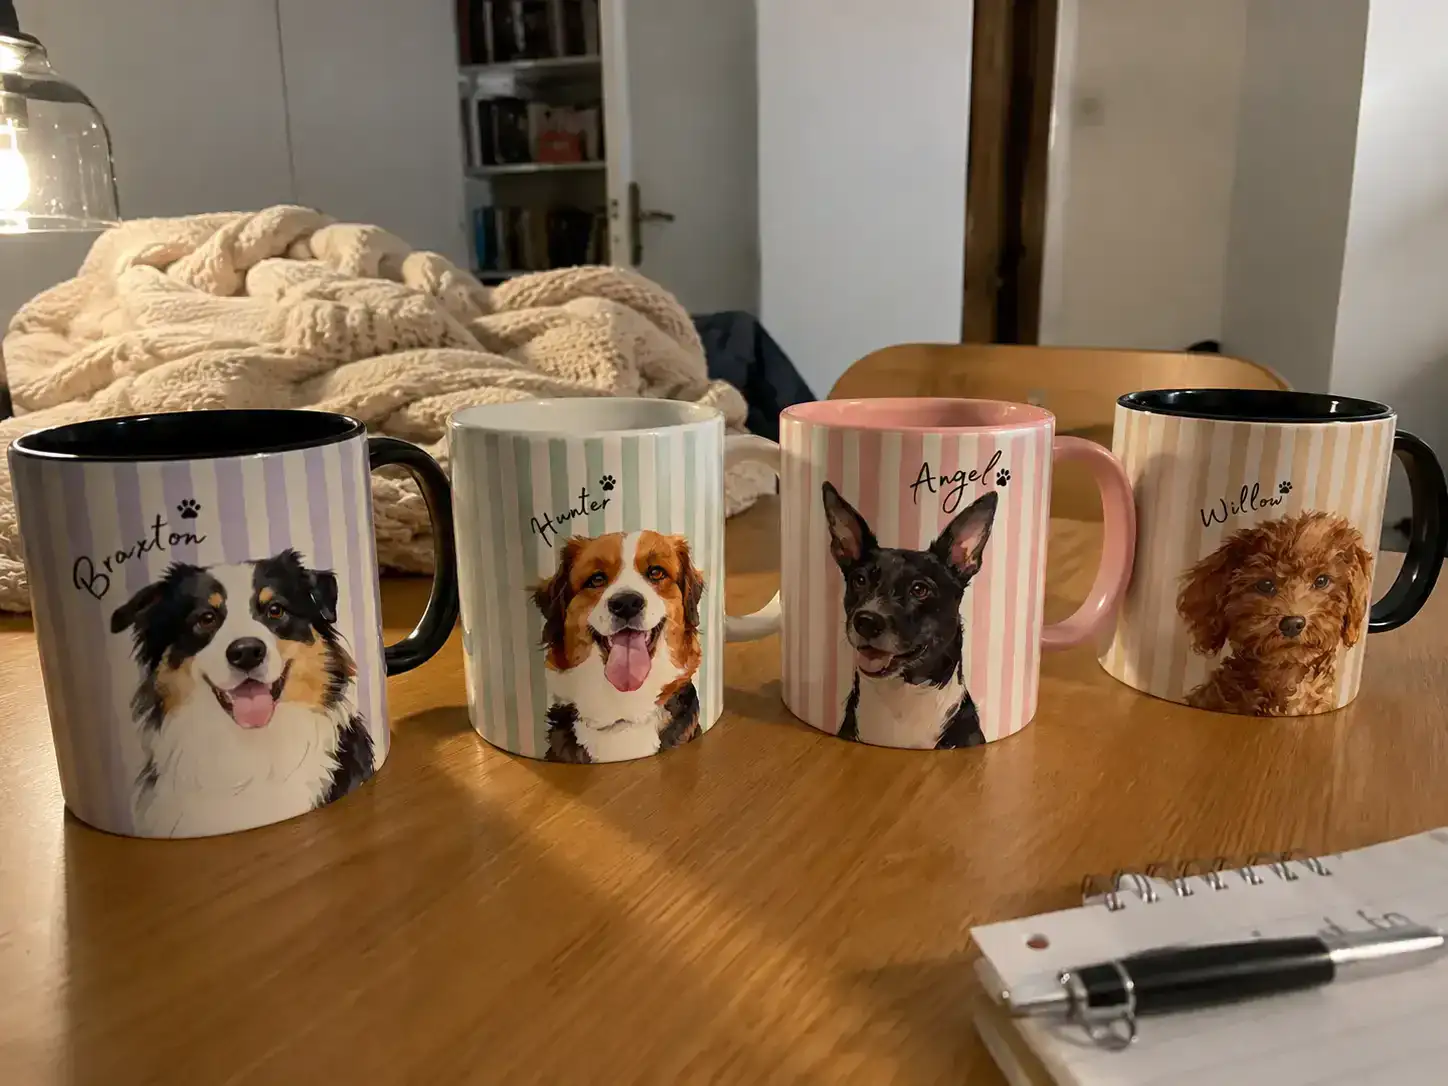
Make the product easy to share
For personalized products, shareability can be your strongest marketing asset. People share products that make them think of a pet, a family member, a home, or an inside joke. Build around a design people already understand, then give the buyer a reason to show the result to someone else.
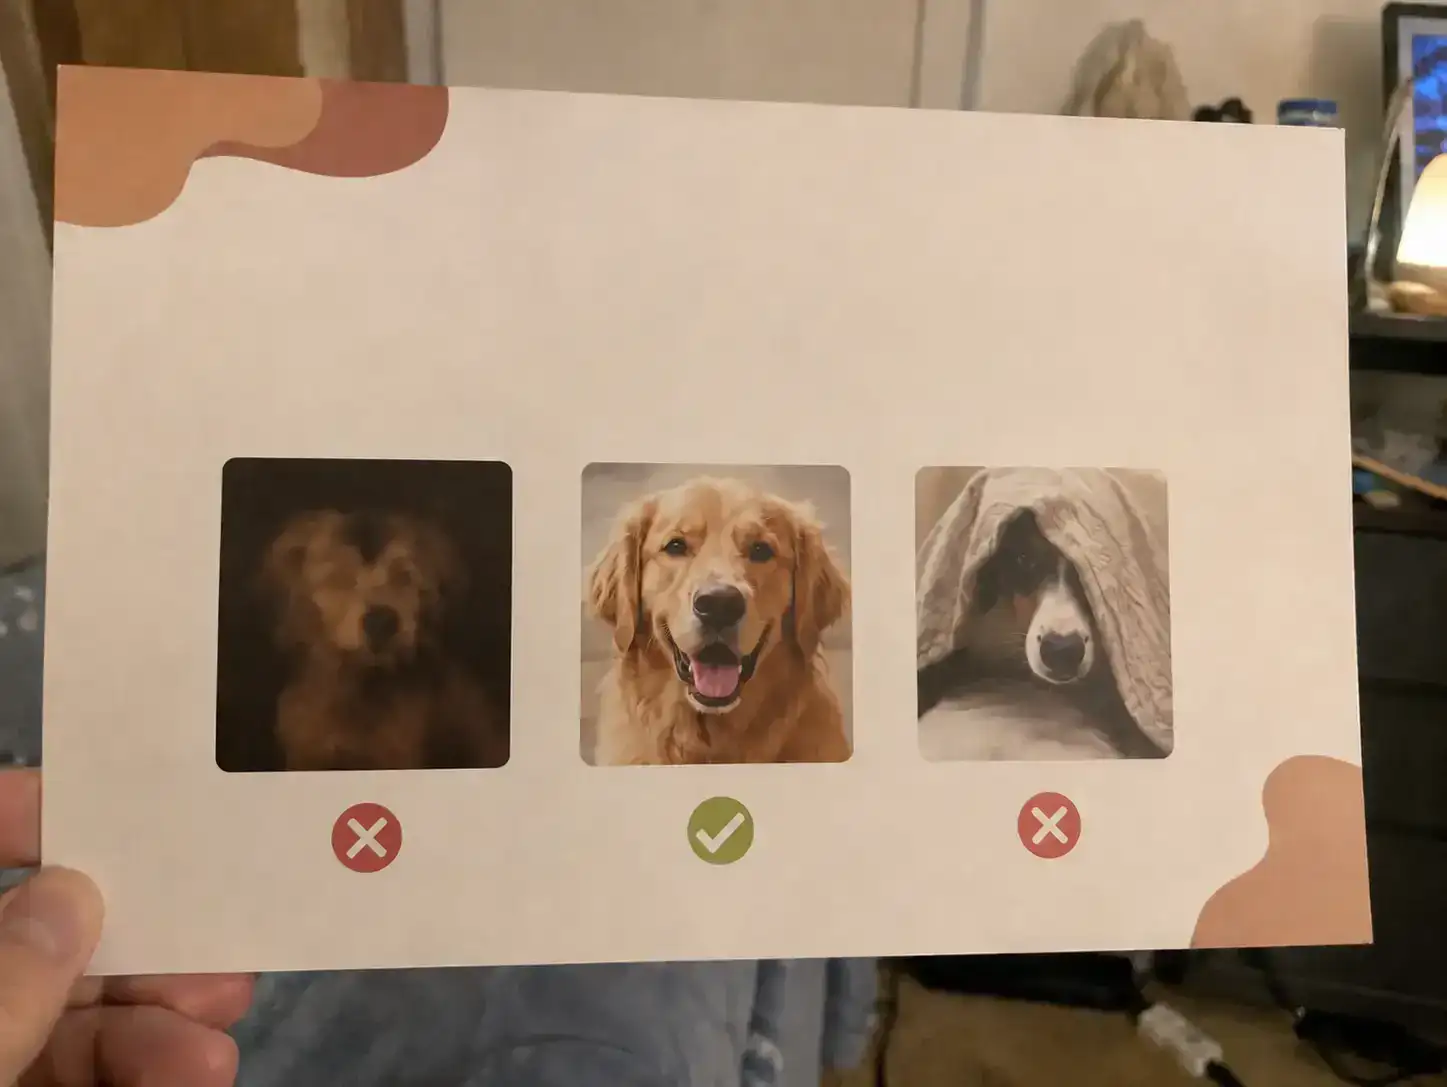
Use your listing to teach the buyer what makes a good input. A simple example image can show the difference between a usable photo and one that will produce a weak result. This reduces confusion before generation and gives the product a better chance of being shared after the preview is ready.
What an AI product personalizer for Shopify does
The label covers a few different products. A layer-based customizer lets the shopper edit prepared text, colors, photos, or clipart. An AI product personalizer creates new artwork from the shopper’s input under rules set by the merchant.
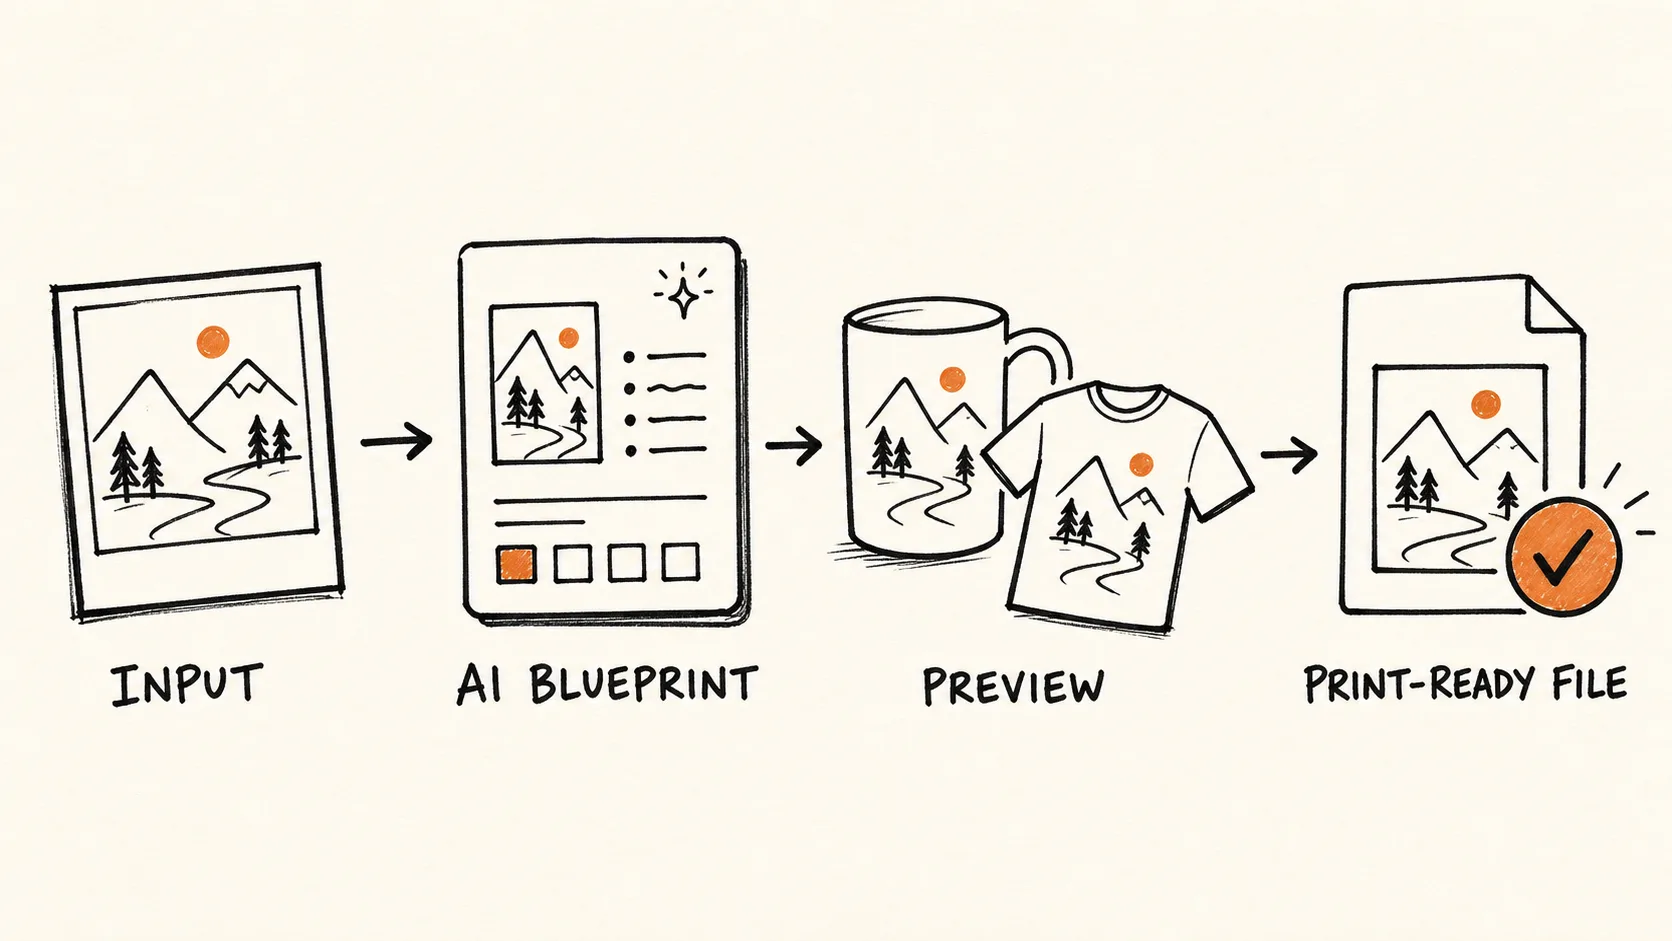
Use one simple test: can you follow a shopper from the first upload to a product they can approve, and then to the file the supplier needs? A working workflow has four parts:
- Shopper input: a photo, name, message, location, or another field that changes the design.
- AI Blueprint: reusable instructions for the style, composition, variables, references, and output rules.
- Preview before checkout: a product mockup that lets the shopper inspect the result before paying.
- Production asset: the approved artwork, connected to the paid line item and the right supplier product or variant.
If one link is missing, the tool may still help you explore design ideas. It is not a complete Shopify product personalizer until the result survives the path from input to fulfillment.
Build one product first
1. Start from a product idea people already understand
Pick one product with a clear occasion: a pet portrait mug, a house illustration, a family poster, or a personalized canvas. If you do not have an idea yet, use Etsy to see what is already being bought in your niche. Show a few examples in your listing so buyers understand the product before they upload anything.
Do not start with a catalogue. Choose one product, one supplier variant, and one print area. Your first job is to learn where that offer breaks.
2. Write a simple promise
Describe the input, the result, and the product in one sentence:
Upload a photo of your dog, preview the portrait on a mug, and buy the version you approve.
The sentence is your first test. Is the input clear? Is the subject recognizable? Does the artwork fit the print area? Can the shopper decide in a few seconds?
3. Create the AI Blueprint
The Blueprint is the reusable recipe behind the product. Define the shopper inputs, visual style, composition, image model, print format, and rules that protect production quality.
Good rules are testable. For a pet mug, the brief might preserve the animal’s recognizable features, use one illustration style, place the name once, leave a clear print area, and exclude extra text or watermarks. Ask for a field only when it changes the result or prevents a mistake.
If you are still shaping the prompt, use the AI design prompt generator to turn a reference image into a testable brief.
4. Preview the actual product before publishing
Run the same product with several realistic inputs: a sharp phone photo, a dark photo, a cropped subject, a busy background, and the longest allowed text. Keep the failures. They show whether the Blueprint needs a better input rule, another composition, or a limited retry path.
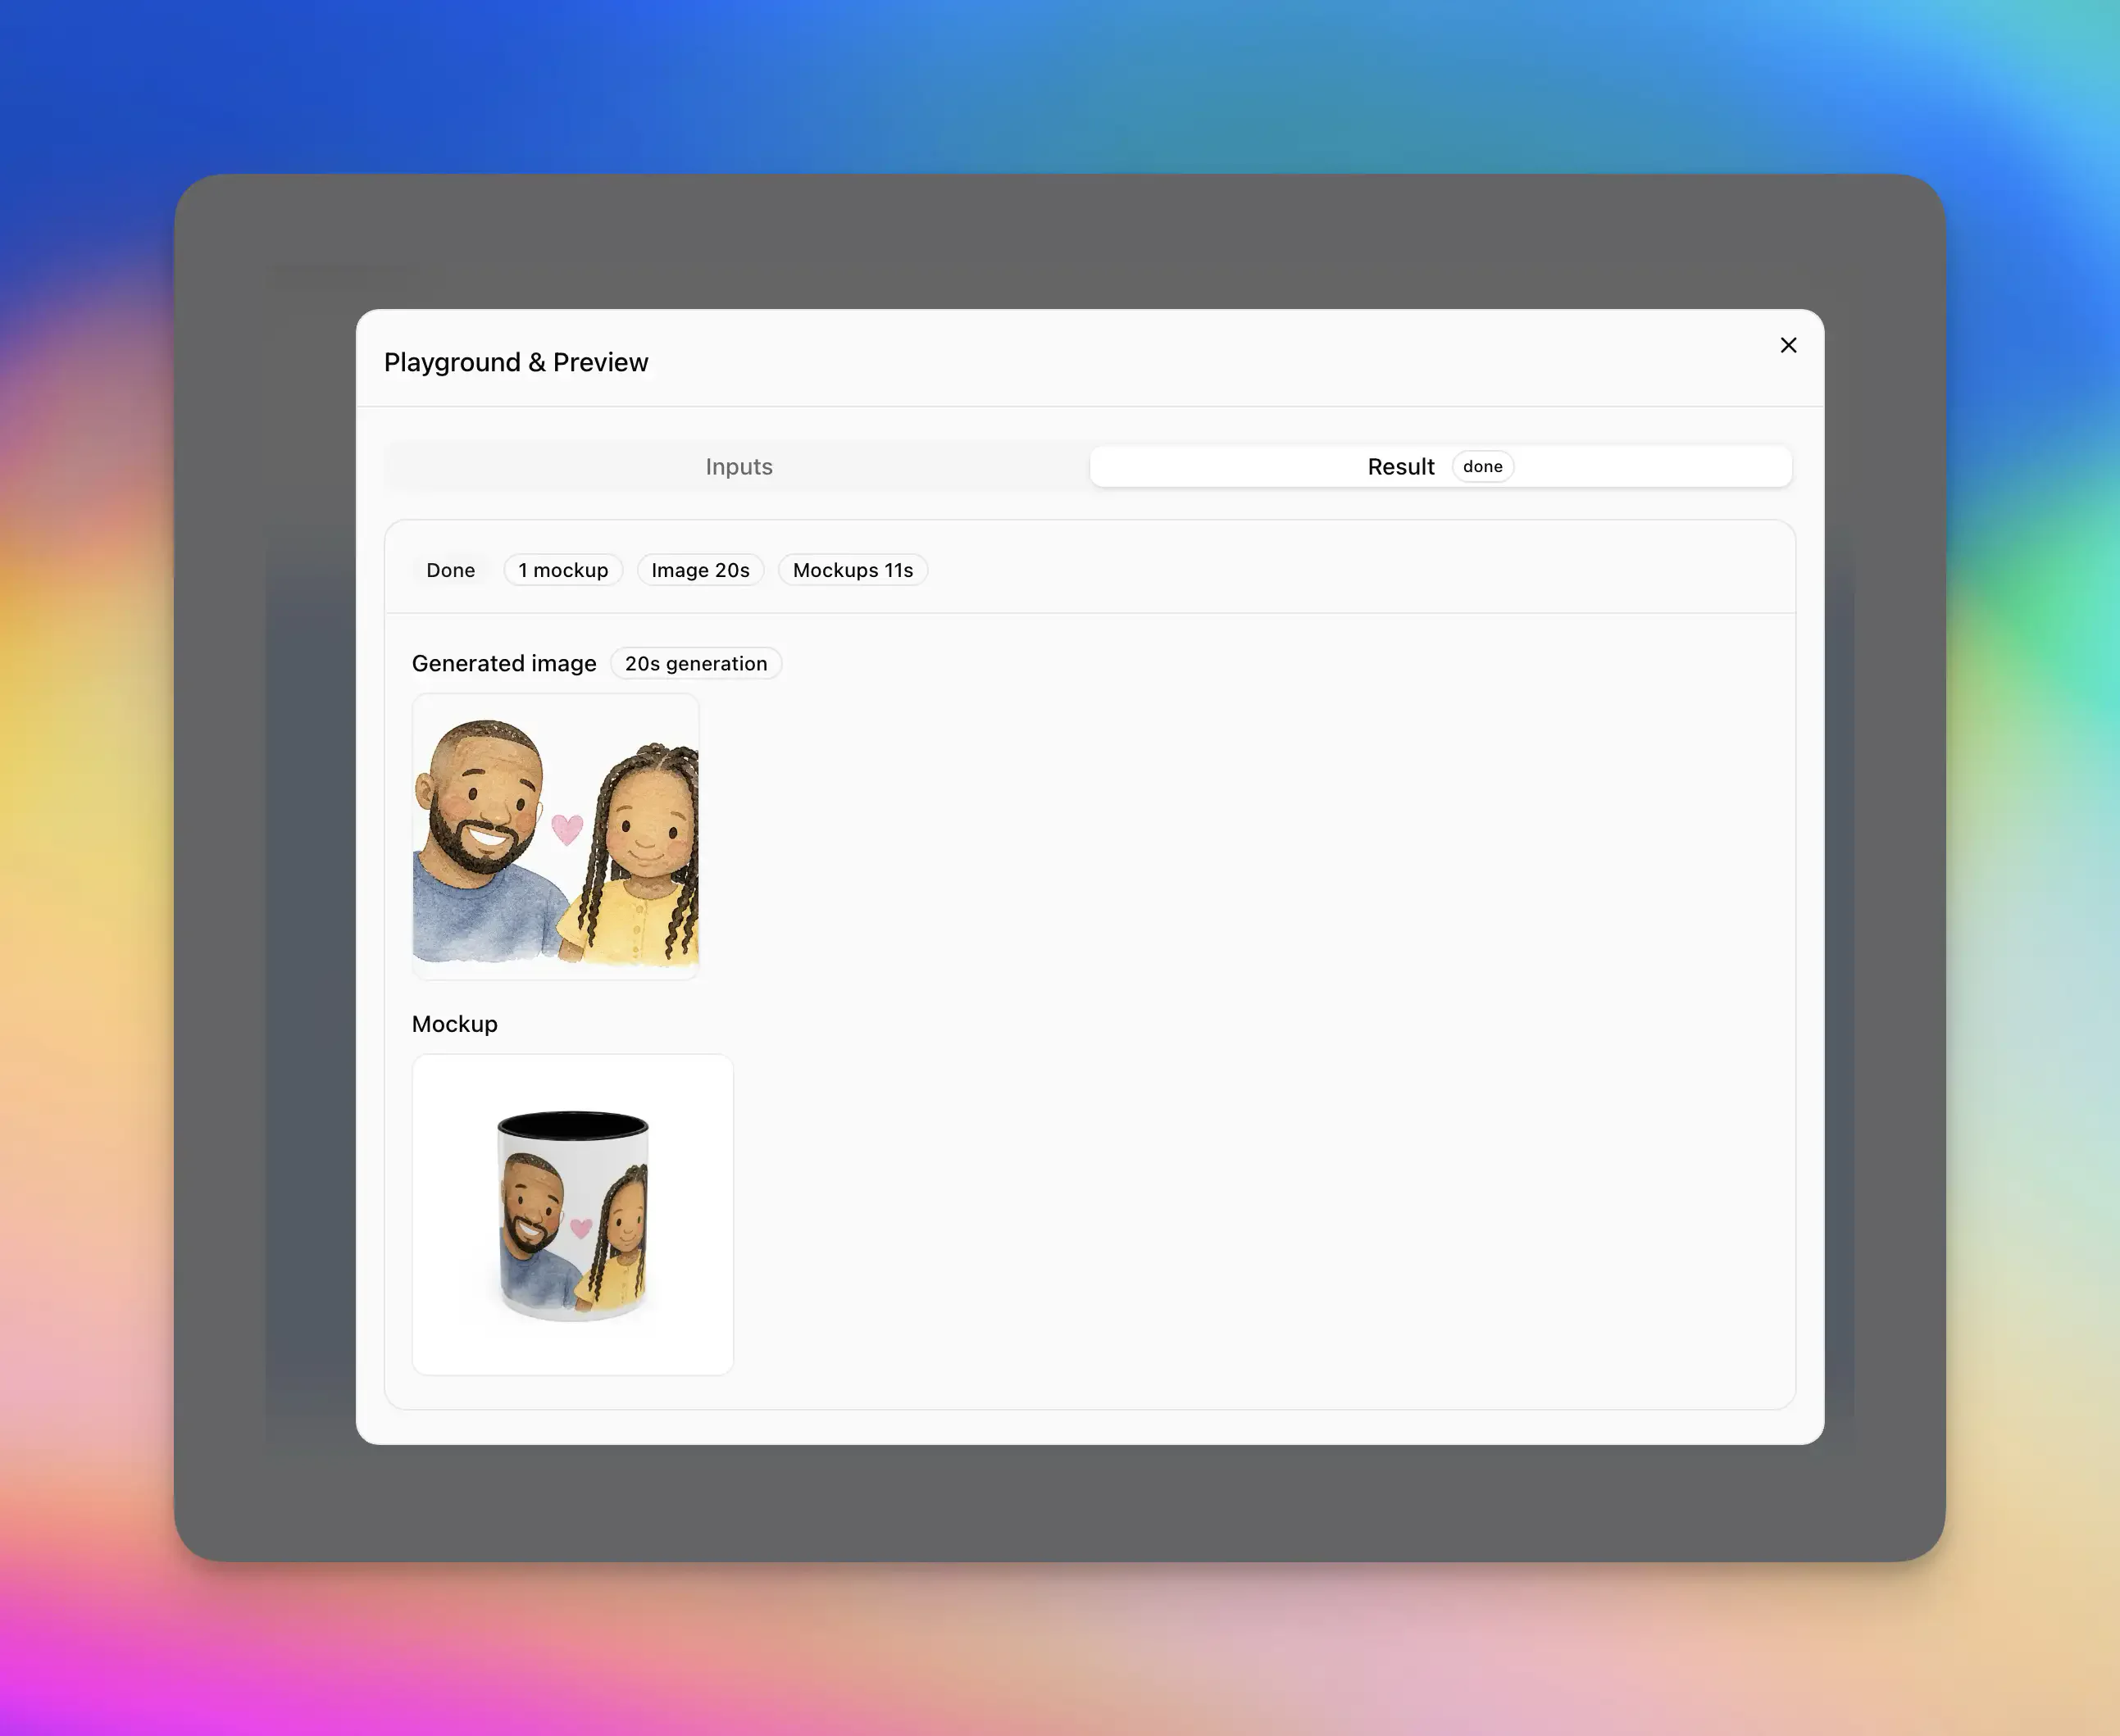
Then inspect the real product preview. The generated image is only half the promise. The shopper needs to see the crop, placement, scale, and product context before adding the item to the cart.
Before publishing, run the product page through the AI listing checker.
See the buyer experience
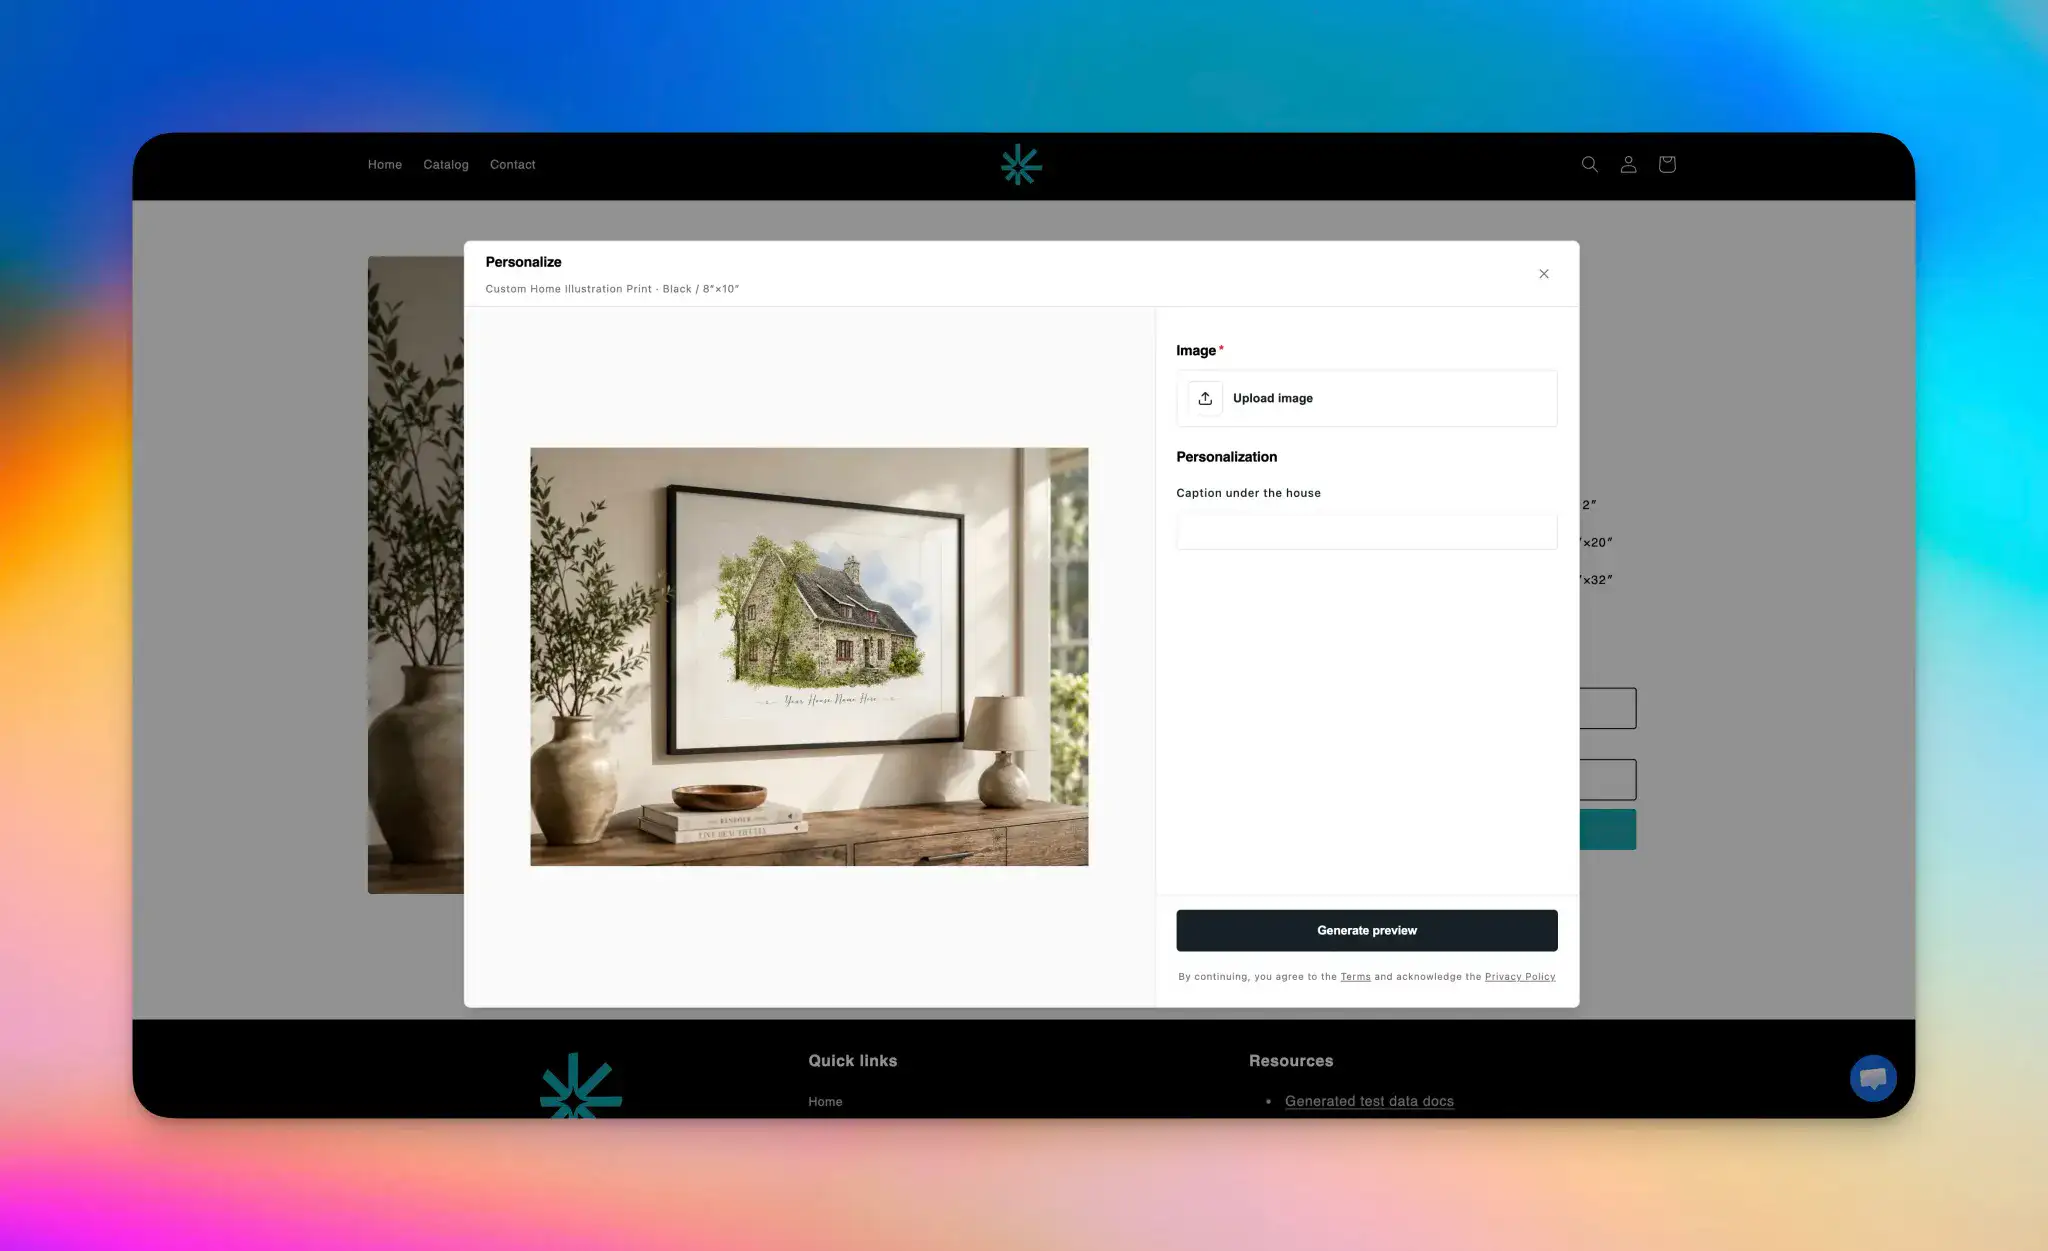
Want to see the process from the buyer’s side? Open the demo store to follow the sequence your product needs to support: the shopper uploads an image, adds personalization details, generates a preview, and sees the final result on a real product mockup before checkout. Test that complete path, not only the generated image.
See the buyer experience in the demo store
5. Connect Shopify and run a paid test order
Install the app on the Shopify store, connect a supported supplier, and select the exact product, print surface, and variant. Check dimensions, supported file types, bleed, safe area, and shipping availability for the product you plan to publish.
Follow one paid test order from the final asset through the selected variant, supplier submission, and physical sample. Check pixel dimensions, crop, spelling, and the mapping between the Shopify line item and the supplier order. If a validation fails, hold the order for review.
For a fuller walkthrough of the production path, read AI product personalizer for print on demand.
Shopify launch checklist
Before publishing, confirm each item:
- The product promise names the shopper input, visible result, and product.
- One product, one supplier variant, and one print area are configured.
- The AI Blueprint defines the inputs, visual rules, output format, and attempt limit.
- The listing shows examples and explains which inputs work.
- The preview shows the actual product context before checkout.
- Test photos, long text, poor lighting, and unusual crops have been reviewed.
- The approved preview remains attached to the Shopify line item.
- One paid test order and one physical sample have passed review.
If one box is still open, keep the product in draft. A smaller launch is easier to debug than a catalogue full of uncertain workflows.
How Personalize.design fits
Personalize.design is for Shopify POD products where the shopper’s input becomes new artwork. A merchant creates a reusable AI Blueprint, connects it to a product, tests the previews, and publishes when the path is ready.
It fits visual products such as portraits, wall art, apparel, mugs, and gifts. The value is in turning flexible input into generated artwork and a production file, so you can test and sell ideas that would have required much more manual design work.
Use the opportunity, not only the cost
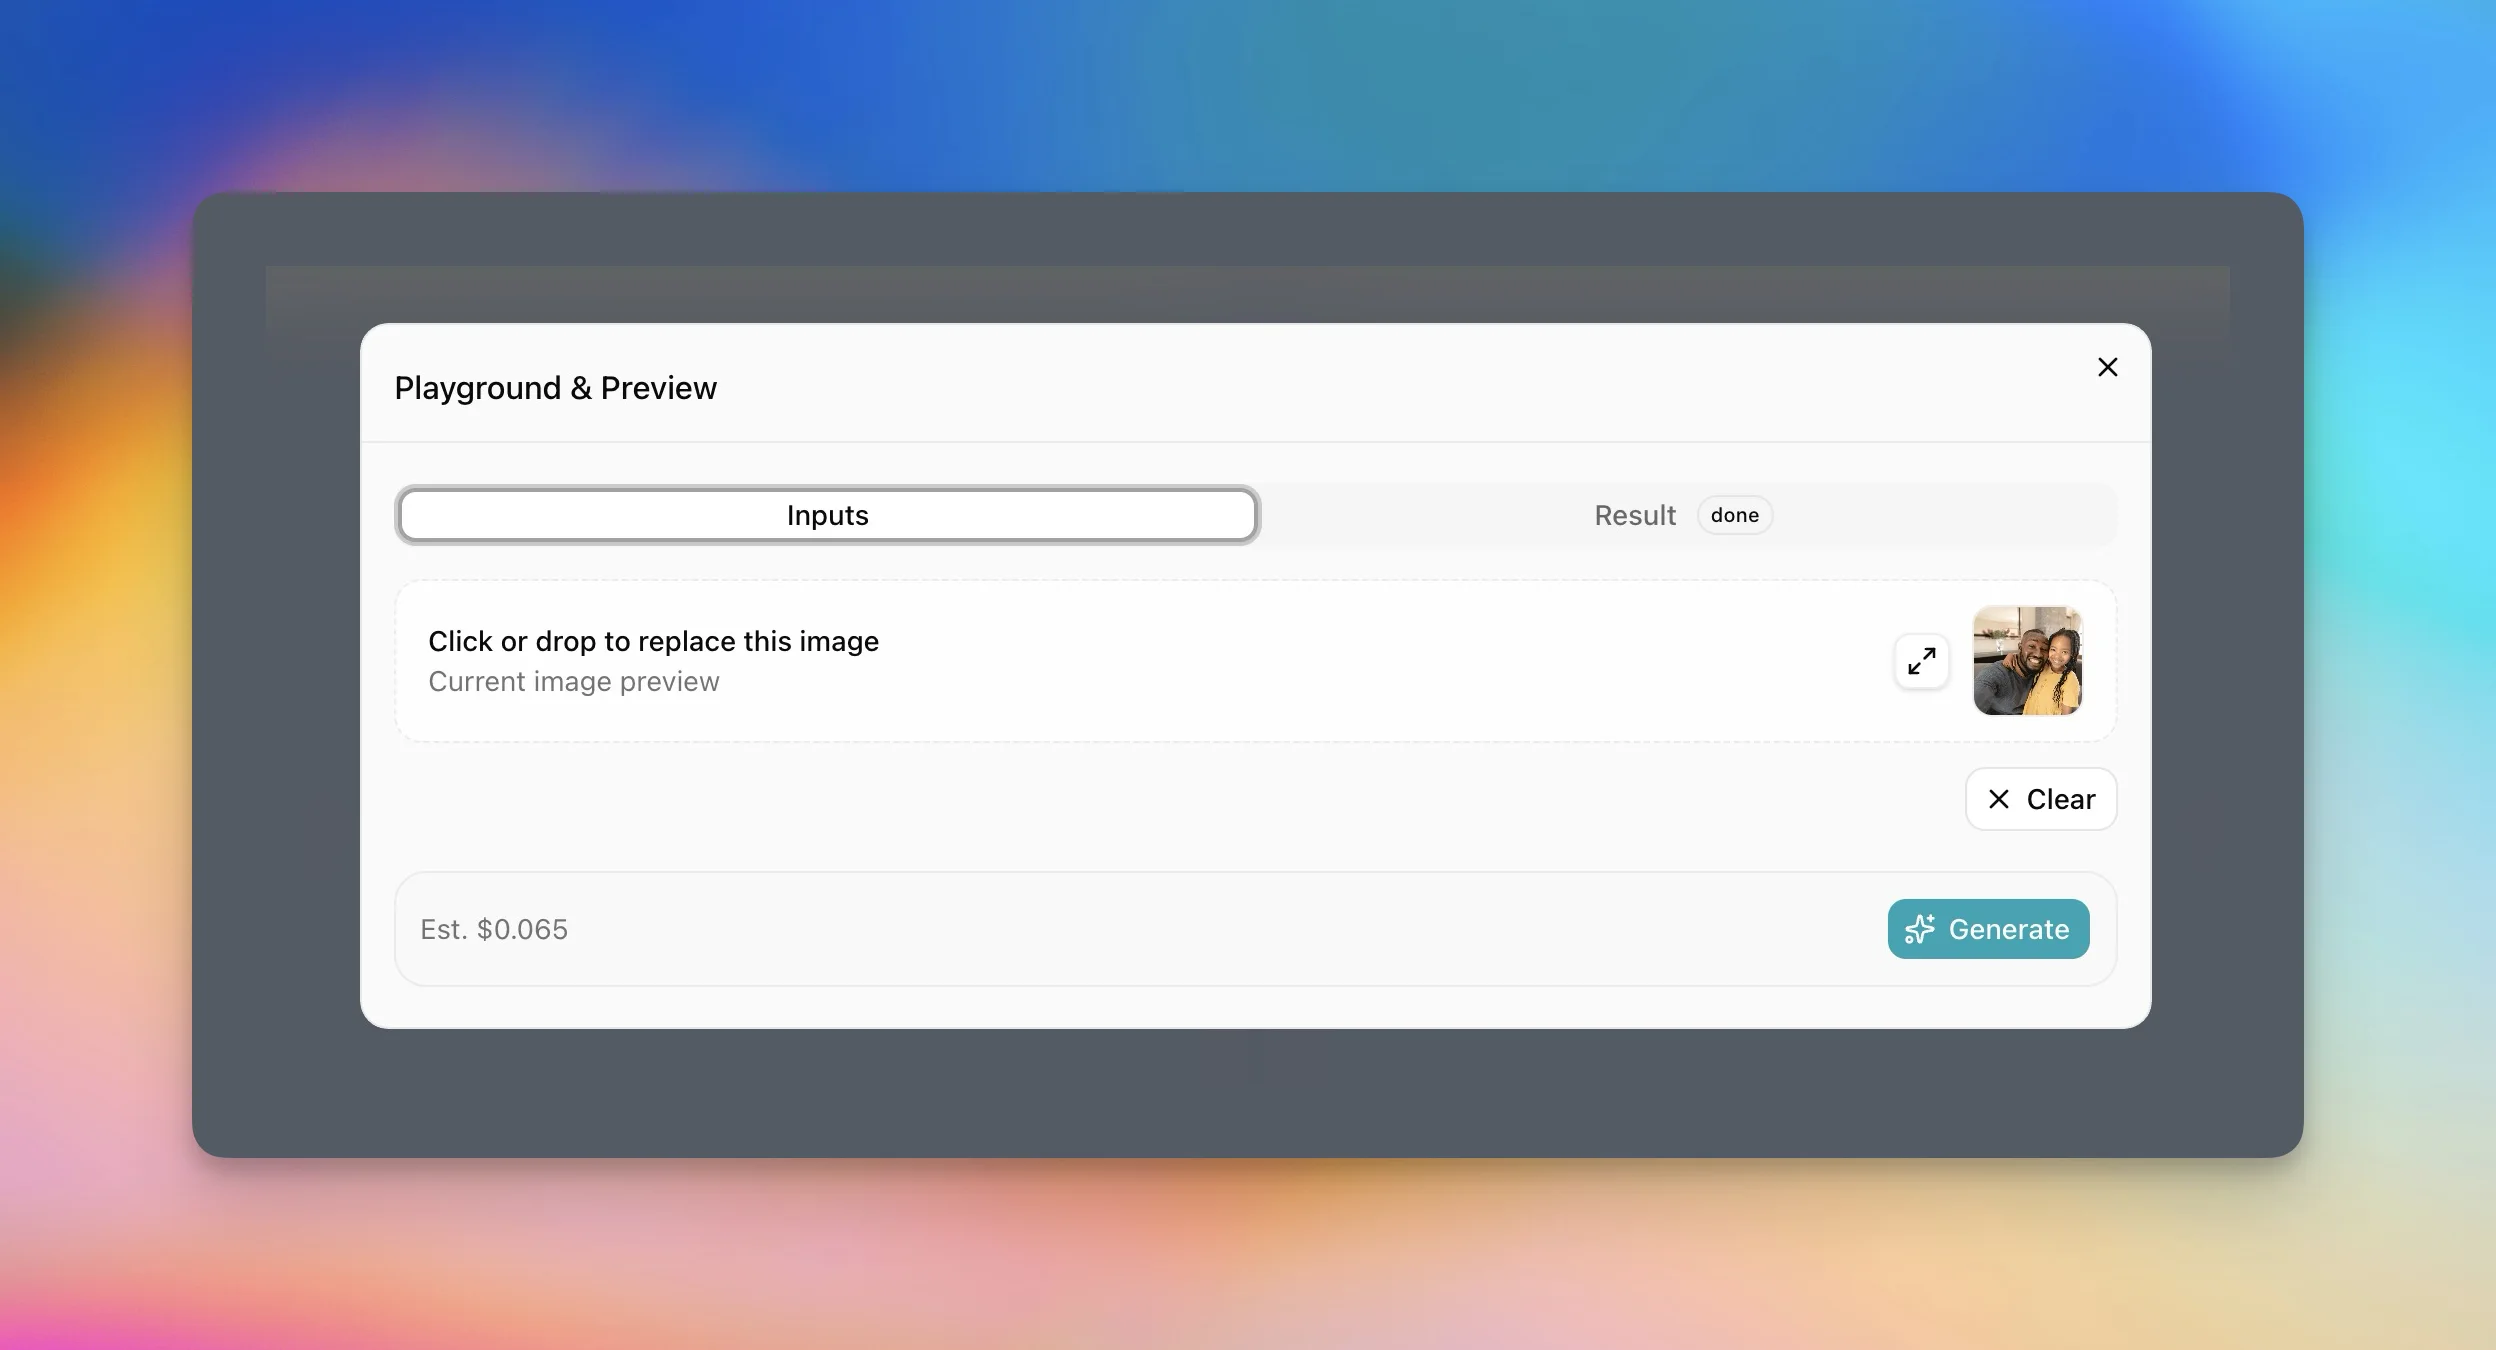
With Personalize.design, an AI generation costs a few cents, depending on the model and settings. The exact cost is visible in the preview tool before you generate. That makes it easier to test a concrete product instead of deciding from an abstract promise.
The better calculation includes the opportunity cost of not launching a product that could work, plus the room to charge more for something that feels personal and designed. A few cents of generation cost can be easy to absorb when the product has a clear occasion, a strong preview, and enough margin. You still need to include retries, abandoned previews, supplier costs, payment fees, returns, and support in your margin model.
Build is free for creating and testing drafts. Launch is the paid path for publishing and selling on Shopify; check the current Personalize.design pricing before launch because plan terms can change.
Questions merchants usually ask
Is an AI product personalizer the same as a Shopify product customizer?
The categories overlap. A customizer lets shoppers edit prepared layers, text, colors, or images. An AI product personalizer generates new artwork from the shopper’s input. Compare the actual workflow rather than the label.
Can shoppers see the result before checkout?
They can when the app supports a pre-checkout generation and product-preview flow. Confirm that the preview is tied to the cart and that the same approved asset reaches fulfillment.
What products work well with AI personalization?
Start with a visual POD product that has a stable print area and a clear promise: mugs, canvas prints, apparel, posters, or gifts. Look for a product people already share or buy for a specific occasion.
Can a few cents per generation really matter?
Yes, but the generation price is only one input. Use the preview tool to see the output before publishing, set a sensible retry limit, and price the product for the value of the finished offer. The opportunity is testing ideas that were previously too slow or expensive to produce by hand.
Start with one personalized Shopify product
Choose one product that already makes sense in your niche. Show examples, explain the input, preview the real product, and run one paid order. Add a second product only after that path works.
Sources and checks
Updated and checked August 13, 2026:
- Personalize.design pricing: current plan details and AI generation billing.
- Shopify’s product customization guide: differentiation, perceived value, experimentation, and customer expectations.
- Printify’s personalization page: perceived value, gifts, previews, order review, and channel workflow.
- Printify’s automated personalization guide for Shopify: app block, shopper preview, saved design, and order linkage.
- Printify’s print file requirements: file formats, resolution guidance, and product-specific requirements.
The paid-order and failure-path recommendations are editorial guidance. Run your own sample order before promising a specific supplier, format, or fulfillment path.
Install Personalize.design from the Shopify App Store or continue with the full print-on-demand workflow guide.